Getting started
- Ricardo Rufino
- Ricardo Rufino
In this tutorial we will show the steps to use OpenDevice LIBs and easily do communication between a Java application and Arduino.
This tutorial is focused on creating custom applications, if you just want to connect your device and start controlling it, you can use the server. If you do not know OpenDevice, I recommend reading the overview, to understand the features, capabilities, languages and operating models.
Hardware
In this first tutorial we will use the Arduino to be the most popular platform.
For this sample you need only a PC and Arduino (or compatible ).
Software
- Java JDK 1.8 (Windows / Ubuntu)
- Eclipse (or similar)
- Arduino IDE
Step 1 - Installing the library in Arduino
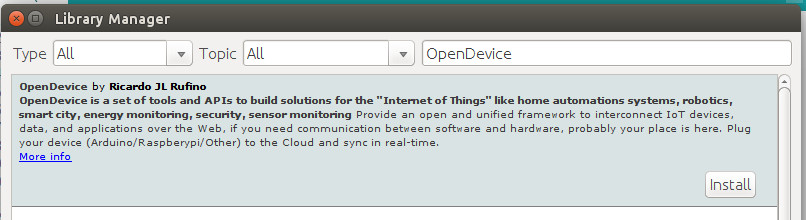
You can install through the Library Manager, click to the "Sketch" menu and then Include Library > Manage Libraries.
Find OpenDevice and click <Install>
Install from source
To install the library, you can simply clone the repository: opendevice-lib-arduino
git clone https://github.com/OpenDevice/opendevice-lib-arduino OpenDevice
And put in the "/libraries" folder of the Arduino IDE.
Remember that some examples in this library need extra libraries that must be downloaded and enabled in the configuration file: dependencies.h
Step 2 - Upload example in to Arduino
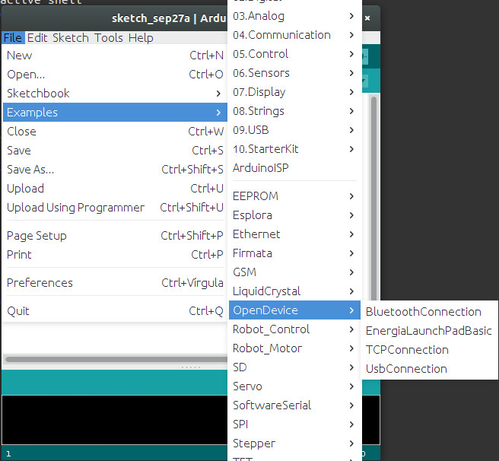
When you import the library, a menu for OpenDevice will be created in 'examples' menu. Choose UsbConnection example, plug arduino and click in upload !
Step 3 - Create a new Java project with maven
If you already work with maven can skip this part (see the pom.xml example)
The best way to start with Java and Maven is using an IDE like Eclipse or Netbeans, we use Eclipse to be the most practical and does not require installation, simply download and unzip.
3.1 Create a project
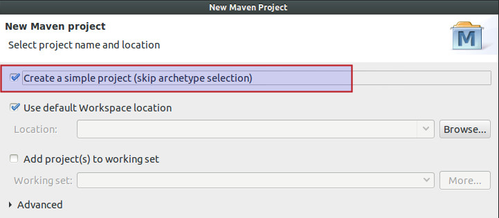
1. Click on menu: File > New > Maven Project
If not in the NEW menu, choose Other and browse the list
2. Choose simple project in next step:
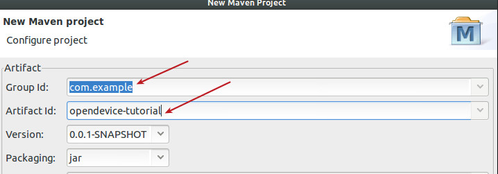
3. Set the name and the group
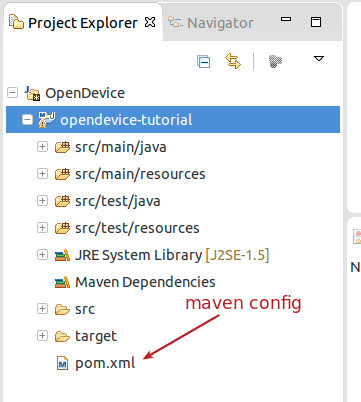
3.2 Add OpenDevice dependency
OpenDevice libraries are managed by maven, he is responsible to download and set up, you simply configure the pom.xml
<project xmlns="http://maven.apache.org/POM/4.0.0" xmlns:xsi="http://www.w3.org/2001/XMLSchema-instance"
	xsi:schemaLocation="http://maven.apache.org/POM/4.0.0 http://maven.apache.org/xsd/maven-4.0.0.xsd">
	<modelVersion>4.0.0</modelVersion>
	<groupId>com.example</groupId>
	<artifactId>opendevice-tutorial</artifactId>
	<version>0.0.1-SNAPSHOT</version>
	<properties>
		<project.build.sourceEncoding>UTF-8</project.build.sourceEncoding>
		<opendevice-version>[0.1.3-SNAPSHOT,1.0.0)</opendevice-version>
	</properties>
	<dependencies>
		<dependency>
			<groupId>br.com.criativasoft.opendevice</groupId>
			<artifactId>opendevice-connection-stream</artifactId>
			<version>${opendevice-version}</version>
		</dependency>
		<dependency>
			<groupId>br.com.criativasoft.opendevice</groupId>
			<artifactId>opendevice-core</artifactId>
			<version>${opendevice-version}</version>
		</dependency>
	</dependencies>

    <repositories>
        <repository>
            <id>oss.sonatype.org</id>
            <url>https://oss.sonatype.org/content/repositories/releases</url>
        </repository>
        <repository>
            <id>oss.sonatype.org-snapshot</id>
            <url>https://oss.sonatype.org/content/repositories/snapshots</url>
        </repository>
    </repositories>
</project>
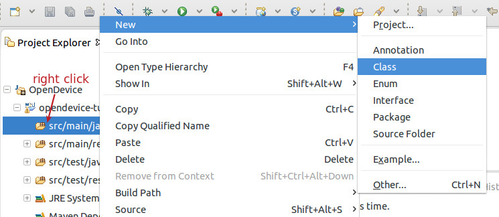
3.3 Create um new Java Class

import br.com.criativasoft.opendevice.core.LocalDeviceManager;
import br.com.criativasoft.opendevice.core.model.Device;
import java.io.IOException;

public class Demo extends LocalDeviceManager {

    public static void main(String[] args) { launch(args); }

    public void start() throws IOException {

        Device led = new Device(1, Device.DIGITAL);

        connect(out.usb()); // Connect to first USB port available

        while(true){
            led.on();
            delay(500);
            led.off();
            delay(500);
        }
    }
}
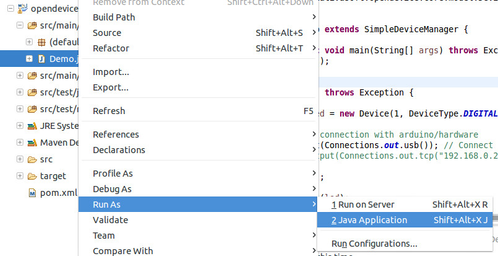
Now you must see the LED blinking in the Arduino
Adding Hardware
Now that you have control of the gates of Arduino, you can control various devices such as lamps, fans, coffeemakers, robots, etc. ..
To control this type of device you will need a relay, which is a device capable of controlling high voltages.
Example:
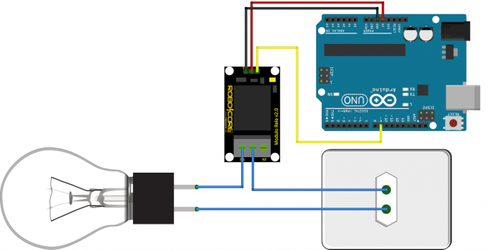
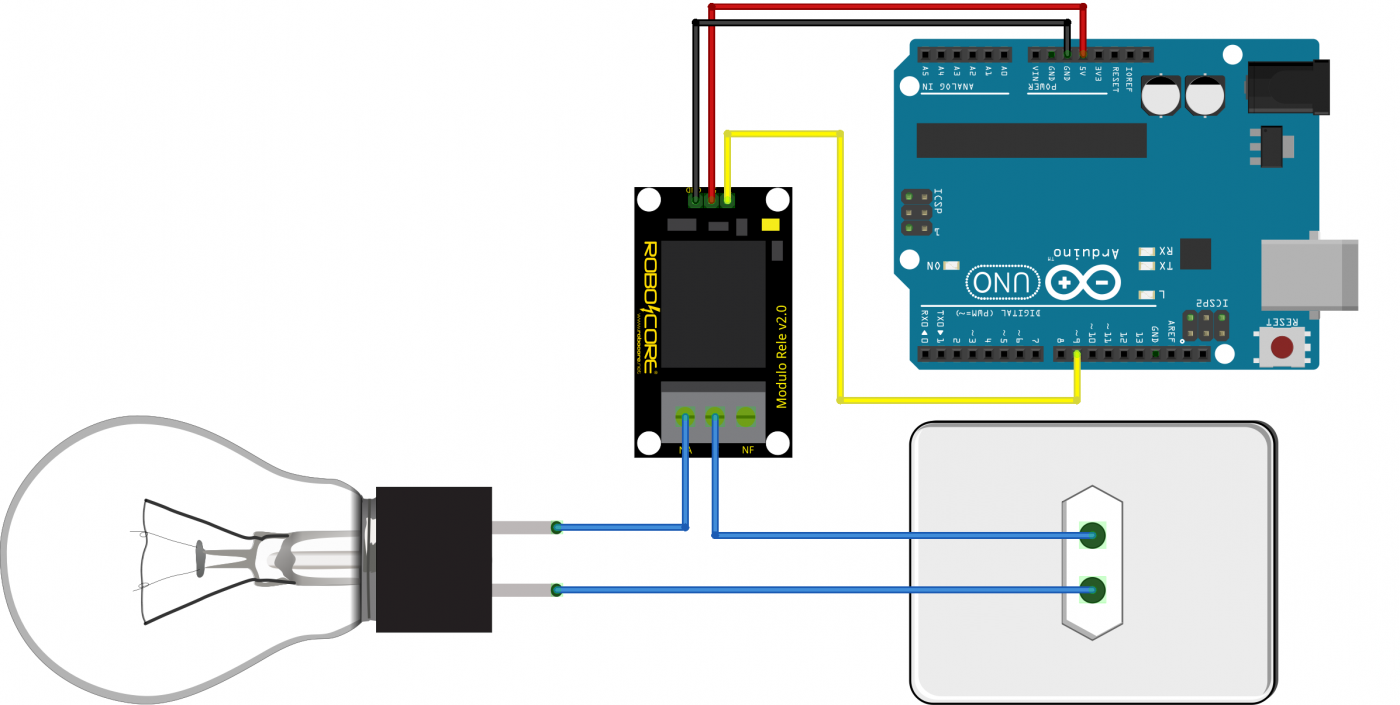
Some relay modules are active-low, ie they are triggered with a negative pulse, in which case you can configure it like this:
ODev.addDevice("light", 9, Device::DIGITAL)->invertedState();
Reference: http://openenergymonitor.org/emon/buildingblocks/mains-ac-relay-module
Tutorial: http://www.instructables.com/id/Connecting-a-12V-Relay-to-Arduino/
In this example we created our own application to connect and manipulate devices directly, this model is very similar to Android development. The OpenDevice project provides a standard server (opendevice-middleware) that contains a dashboard for management, visualization, and storage that you can use and customize to create your project.
The examples and code used in this tutorial and others can be found here:
https://github.com/OpenDevice/opendevice-examples/tree/master/opendevice-tutorial
See next step: Adding REST Support
Troubleshooting
If you have a problem, check this guide: Troubleshooting